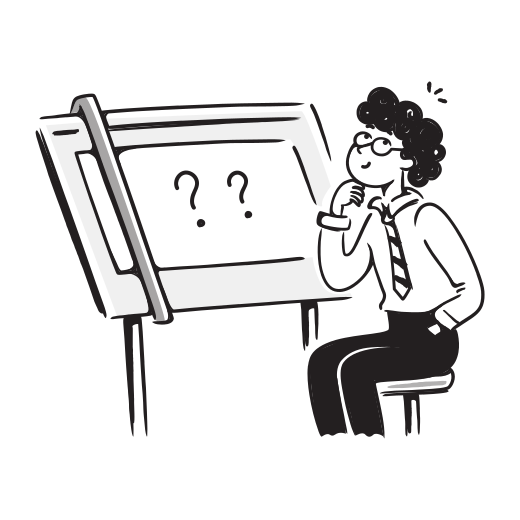
Wireframes are the skeletal blueprints of a website and its underlying structure that define the layout and functional requirements before any visual design begins. They ensure the core logic and user journey remain the focus during early development.
What is a Wireframe?
A wireframe in web design is a two-dimensional schematic that acts as a visual guide for the framework of a website. It focuses on the allocation of space, the prioritisation of content, and the intended behaviours of users without using colours or images.
These diagrams are the connective tissue between the initial conceptual ideas and the final aesthetic interface. Designers use them to establish where specific elements like headers, buttons, and contact forms will sit on the page.
Think of a wireframe as the architectural floor plan of a new house. You would not choose the paint colours or the fabric for the curtains before knowing where the walls and doors are positioned.
By stripping away visual distractions, business owners can see exactly how a customer will navigate the site. This clarity prevents misunderstandings about how features work during the later stages of the website design process.
Wireframes come in various forms, ranging from quick hand-drawn sketches on paper to detailed digital layouts. Each version validates the site map and ensures the navigation logic is sound.
Using these blueprints allows the project team to confirm that every business goal is represented in the layout. It ensures the most important information is placed where users expect to find it.
Why Wireframes Save Time and Money
Building a website without a wireframe often leads to expensive revisions when structural flaws are discovered late in the process. Clear schematics prevent these issues by establishing a shared understanding between the business owner and the design team.
- Finding out that a navigation menu is confusing is much cheaper when it is a grey box rather than a fully coded feature. Fixes at this stage require minutes of design time instead of hours of programming.
- Business owners can focus on the logic and hierarchy of information without being distracted by specific shades of blue or font choices. This leads to faster approvals and keeps the project on schedule.
- Developers receive a clear map of what they need to build, which eliminates guesswork and reduces back-and-forth communication. Clarity in the planning phase ensures the initial web design packages remain within budget.
- Wireframes force you to think about the actual words and calls to action that will live on each page. This prevents the common problem of having to shrink or expand designs to fit text that was written as an afterthought.
When you skip this phase, you risk having to tear down completed work because a fundamental user requirement was missed. Redesigning a finished page is significantly more labour-intensive than moving boxes on a digital canvas.
Most successful digital projects rely on this documentation to align expectations across the entire project team. It acts as a contract of sorts that defines what will be built before the expensive work begins.
Clients who invest in wireframing often find that the final product requires fewer technical updates during long-term website management. The site is simply built better from the ground up.
Low-Fidelity, Mid-Fidelity, and High-Fidelity Wireframes
Wireframes exist on a fidelity spectrum. Low-fidelity wireframes are quick sketches used for brainstorming, mid-fidelity versions add structure and annotations, and high-fidelity wireframes provide detailed layouts for final approval.
| Feature | Low-Fidelity | Mid-Fidelity | High-Fidelity |
|---|---|---|---|
| Purpose | Rapid ideation and structure | Refined layout with annotations | Detailed UX and interaction testing |
| Visual Detail | Boxes, lines, placeholder text | Accurate spacing, labelled elements | Specific spacing, icons, real copy |
| Creation Time | Minutes | Hours | Hours to days |
| Feedback Focus | General layout and flow | Content hierarchy and navigation | Specific functionality and data display |
| Interactivity | Static (paper or whiteboard) | Limited clickable areas | Fully clickable prototypes |
Low-fidelity options are excellent for initial workshops where ideas need to be captured quickly without worrying about exact pixel placement. They encourage stakeholders to speak up about the user journey because the design looks intentionally unfinished.
Mid-fidelity wireframes sit in the middle ground. They include accurate element sizing, real navigation labels, and annotations that explain how interactions should work. Most designers use mid-fidelity as their primary working format because it gives enough detail for meaningful feedback without locking in visual decisions too early.
High-fidelity wireframes are reserved for projects involving complex data sets or unique user interactions. They provide a much clearer picture of how the final product will feel to the end user before the visual skin is applied.
Many designers start with low-fidelity sketches to establish the basics and then move through mid-fidelity before reaching high-fidelity for final sign-off. This tiered approach allows for flexibility while maintaining a path toward a polished result.
How to Create a Wireframe
Creating a wireframe follows a repeatable process whether you are working on a single landing page or an entire website. The steps remain consistent regardless of which tool you use.
- Define the page goals. Before drawing anything, write down what this specific page needs to accomplish. A homepage has different objectives to a contact page or a service page. Every element you place on the wireframe should support one of these goals.
- List the content elements. Write out every piece of content and functionality the page requires: headings, body text, forms, buttons, navigation, testimonials, images. Prioritise them by importance to the user.
- Sketch the layout structure. Start with the broadest containers first. Where does the header sit? How wide is the content area? Is there a sidebar? Block out the major regions before placing individual elements inside them.
- Map the navigation and user flow. Show how a visitor moves through the page and where they go next. Every button and link should have a clear destination. If a user lands on this page from a Google search, can they find what they need within two clicks?
- Iterate based on feedback. Share the wireframe with your team or client and ask specific questions: “Can you find the contact form?” or “Is the most important information above the fold?” Revise based on their responses.
The whole point of this process is speed. A wireframe that takes longer to create than the final design has missed the mark. Keep it rough, keep it functional, and save the polish for later stages.
Wireframe vs Prototype vs Mockup
These three terms get used interchangeably, but they refer to different deliverables at different stages of a web design project.
| Deliverable | What it shows | Interactivity | When it is used |
|---|---|---|---|
| Wireframe | Structure, layout, content placement | None or minimal | Early planning stage |
| Mockup | Visual design (colours, typography, imagery) | None (static image) | After wireframe approval |
| Prototype | Real interactions and user flows | Fully clickable and testable | Before development begins |
A wireframe answers “where does everything go?” A mockup answers “what does it look like?” A prototype answers “how does it work?”
Not every project needs all three. Smaller websites might move straight from a wireframe to development, while complex web applications typically require all three stages to reduce risk. The decision depends on the project budget, the number of stakeholders involved, and how much custom functionality the site requires.
Wireframing Tools Designers Use
Designers use specific software to create wireframes efficiently and facilitate collaboration between team members. The right tool depends on team size, budget, and whether you need real-time collaboration.
- Figma is a web-based tool that allows multiple people to work on the same design in real-time. It handles everything from low-fidelity wireframes through to high-fidelity prototypes, making it the most popular choice for teams of any size.
- Balsamiq forces a deliberately low-fidelity, hand-drawn look. It is specifically designed to keep conversations focused on structure and content rather than aesthetics, which makes it ideal for early workshops with clients.
- Sketch is a long-standing favourite for macOS users that focuses on simplicity and plugin extensibility. It has a massive library of UI kits that help designers move quickly from wireframe to mockup.
- Pen and paper remain the fastest wireframing tool for solo brainstorming. A whiteboard session with sticky notes can produce a workable site structure in under an hour with zero software overhead.
Professional designers select their tools based on the specific needs of the client and the technical requirements of the website. Modern software makes it possible to share a link with a business owner who can then leave comments directly on specific parts of the layout.
The transition from a static wireframe to a clickable prototype is a major milestone in any web design project. It allows for user testing to occur before a single line of code is written by the development team.
When Wireframing Has Limitations
Wireframes are not a universal fix. There are situations where they introduce friction or fail to communicate the intended experience.
- Clients who are not familiar with the process can struggle to interpret greyscale boxes as a future website. Without proper context, they may feel the design looks “unfinished” or assume the final product will look bland.
- Content often takes up more or less space than the wireframe allocated. Real body copy, translated text, or user-generated content can break layouts that looked clean with placeholder text.
- Wireframes cannot convey motion, animation, or micro-interactions. If the design relies heavily on scroll effects or transitions, a prototype communicates the experience far better than a static layout.
- On very small projects (a single landing page with straightforward content), wireframing can add process overhead that exceeds the time it saves. Experienced designers sometimes skip straight to a rough mockup when the scope is minimal.
None of these limitations mean wireframing should be avoided. They mean the designer needs to choose the right fidelity level and pair the wireframe with clear verbal explanation when presenting to non-technical stakeholders.
Best Practices for Wireframing
Effective wireframing requires a focus on functionality rather than aesthetics. Following established standards helps create a document that is easy for everyone on the project to understand and act on.
- Keep it greyscale. Avoid using any colour other than grey, black, and white to prevent stakeholders from fixating on brand choices. Colour should only appear if it indicates a specific functional state like an error message.
- Use consistent components. Buttons, input fields, and icons should look the same across every page. Consistency helps developers understand the rules of the user interface quickly and reduces confusion during build.
- Focus on user flow. The wireframe should clearly show how a user gets from point A to point B. Map out the path a customer takes to complete a purchase or fill out a contact form.
- Include real content where possible. “Lorem Ipsum” placeholder text can hide layout issues that only appear with actual words. Real headlines and body copy provide a better sense of how the design will perform live.
- Iterate quickly and often. A wireframe should change as the project team learns more about user needs. Frequent updates at this stage are healthy and far cheaper than changes during development.
Business owners should feel comfortable asking questions during this phase if a specific layout choice does not align with their goals. It is the best time to challenge assumptions and refine the strategy before any code is written.
A good website starts with a good plan. The wireframe is that plan, and treating it seriously at the start of a project pays dividends through every later stage.
Frequently Asked Questions
Do I need a wireframe for a small business website?
For most small business websites with five or more pages, yes. Even a rough sketch showing where your headline, contact form, and call-to-action sit on each page prevents expensive layout changes later. Single-page sites or very simple refreshes can sometimes skip this step.
How long does wireframing take?
A low-fidelity wireframe for a standard five-page business website takes one to three hours. High-fidelity wireframes for complex sites with custom functionality can take several days. The time invested here typically saves two to three times that amount during the design and development stages.
Can I create a wireframe myself before hiring a designer?
Absolutely. A hand-drawn sketch showing where you want your logo, navigation, main content, and contact information gives any designer useful input without restricting their creative decisions. Tools like Balsamiq are designed for non-designers who want something slightly more polished.
What is the difference between a wireframe and a sitemap?
A sitemap shows the pages that exist on a website and how they relate to each other (the hierarchy). A wireframe shows the layout of a single page, including where content, buttons, and navigation sit within that page. You typically create the sitemap first, then wireframe the most important pages.
Should wireframes include mobile layouts?
Yes. Over 60% of web traffic in Australia comes from mobile devices (according to StatCounter’s 2026 platform data). Wireframing both desktop and mobile layouts ensures the design works across screen sizes and that important elements are not buried below the fold on smaller screens.
At what stage of a web design project does wireframing happen?
Wireframing happens after the initial discovery phase (understanding business goals, audience, and content requirements) but before any visual design work begins. In a typical web design process, it sits between the sitemap/strategy stage and the mockup/design stage.
Next Steps
A wireframe gives your website project direction before the expensive decisions start. Whether you sketch it on a napkin or use professional software, the act of planning your layout upfront leads to a better finished product and fewer surprises along the way.
If you are planning a new website or a redesign and want a team that builds from a solid foundation, explore our web design services or get in touch to talk through your project.